 | Aloha! It's been a month since my last post. Pregnancy gives me up & down moods on pretty much everything. All I want to do lately isNAP. Today I wanna share my crib project. To better keep an eye on our new baby, I decided to make room for her in our bedroom. Besides, I want my 8 year old daughter to enjoy her room a little longer to herself. Our room is so small that I was just going to get a bassinet next to our bed. Then I learned that there is such thing as mini-crib. Mini crib width measures about 41 inches vs 55 inches for the standard crib. I measured our bedroom, and mini-crib fits perfectly next to our bed! |
| While shopping for a crib, I came across Lullaby Paints. I have been talking about paint withdrawals I've been having, and I was beyond ecstatic to find out there is such thing as pregnancy & newborn paint. I immediately had to find a reason to paint. I thought about painting the crib right away. Buying a brand new crib just to paint it didn't make sense, so I decided to buy a second hand mini-crib. (Thinking if I screw it up painting it, I wouldn't feel so bad.) I found a Mini Crib on Craigslist. I did my homework on the model and specifications of the crib to make sure it's not on recall list and meets the crib safety standards before buying it. | 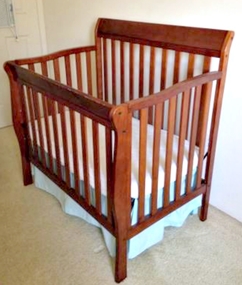 Very nice second hand buy! |
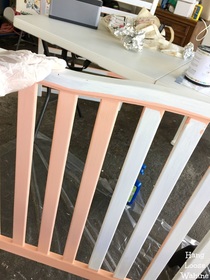
I was in love with my bestie's wedding blush colors, so I ordered paint to match Behr's Blushing Apricot 200A-3. I also bought wood primer. I ordered a quart each. When we picked up the crib, it was already disassembled with the paperwork and hardware. My husband and my daughter lightly sanded the crib.
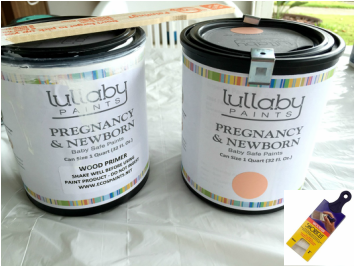 Pregnancy & Newborn Paint paired with my favorite paint brush, Wooster shortcut angled brush. |  Sand Helper |
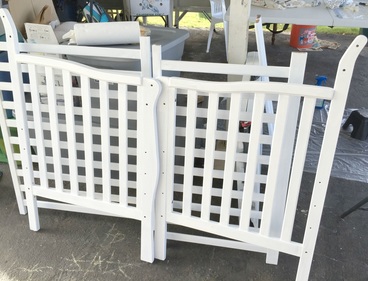
Then my most awaited part - PAINTING! Since the crib is dark wood, I applied three light coats of primer about two hours apart. After about 24 hours, I painted it with two coats of my blush paint. This time the coats were 4-5 hours apart. Lullaby Paints has a very slight smell or almost none.
 |  |
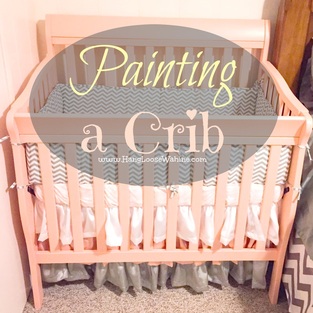
We only allowed 24 hours of curing time before assembling because we're all excited! It looked exactly like how I pictured it! I'm a happy camper!
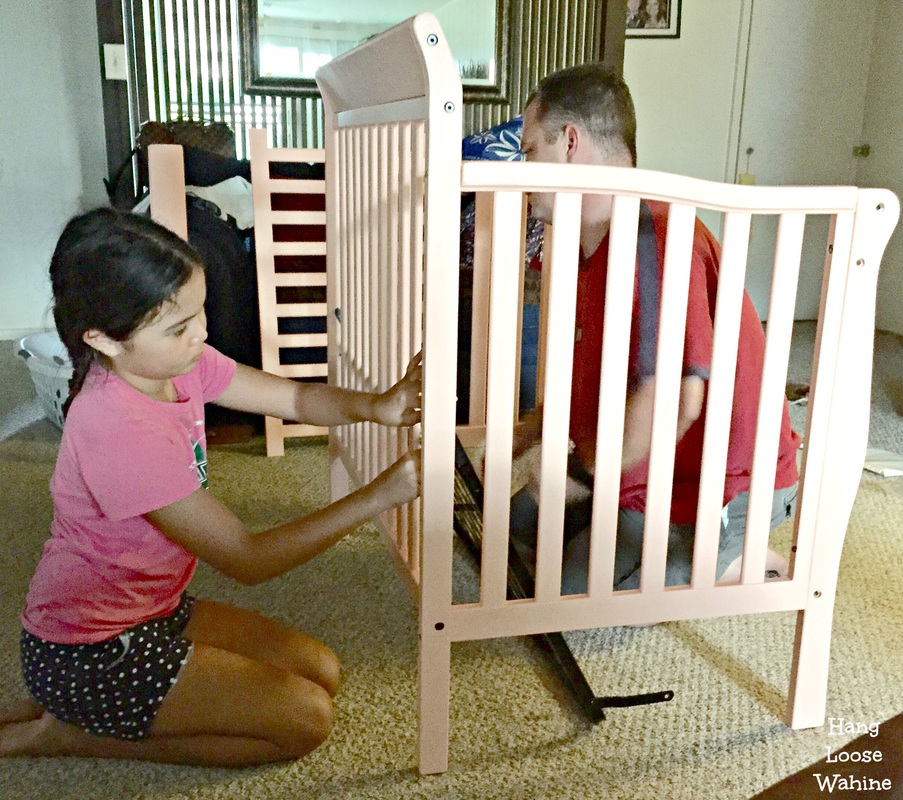 They love assembling units like this together. So cute! | 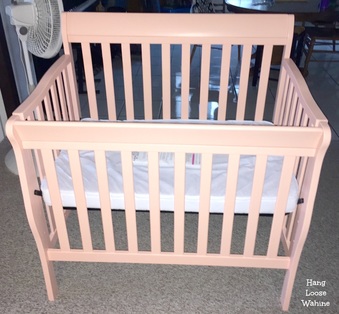 VOILA! My Blush Crib! |
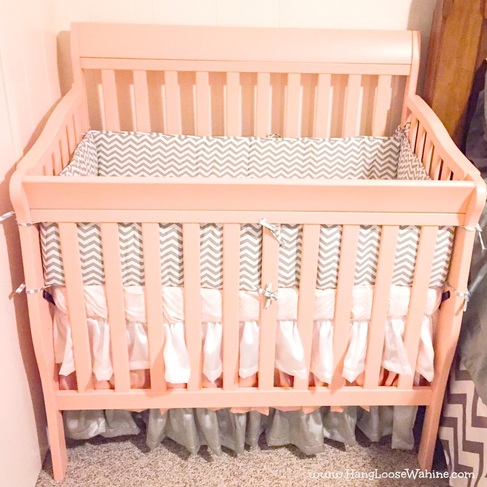
My mom made the crib bedding set to match our bedroom. She did a great job!
This project was super fun! It's because I haven't painted in a while plus the added baby excitement. I hope you enjoyed this post, and somehow learned something from it.


 RSS Feed
